
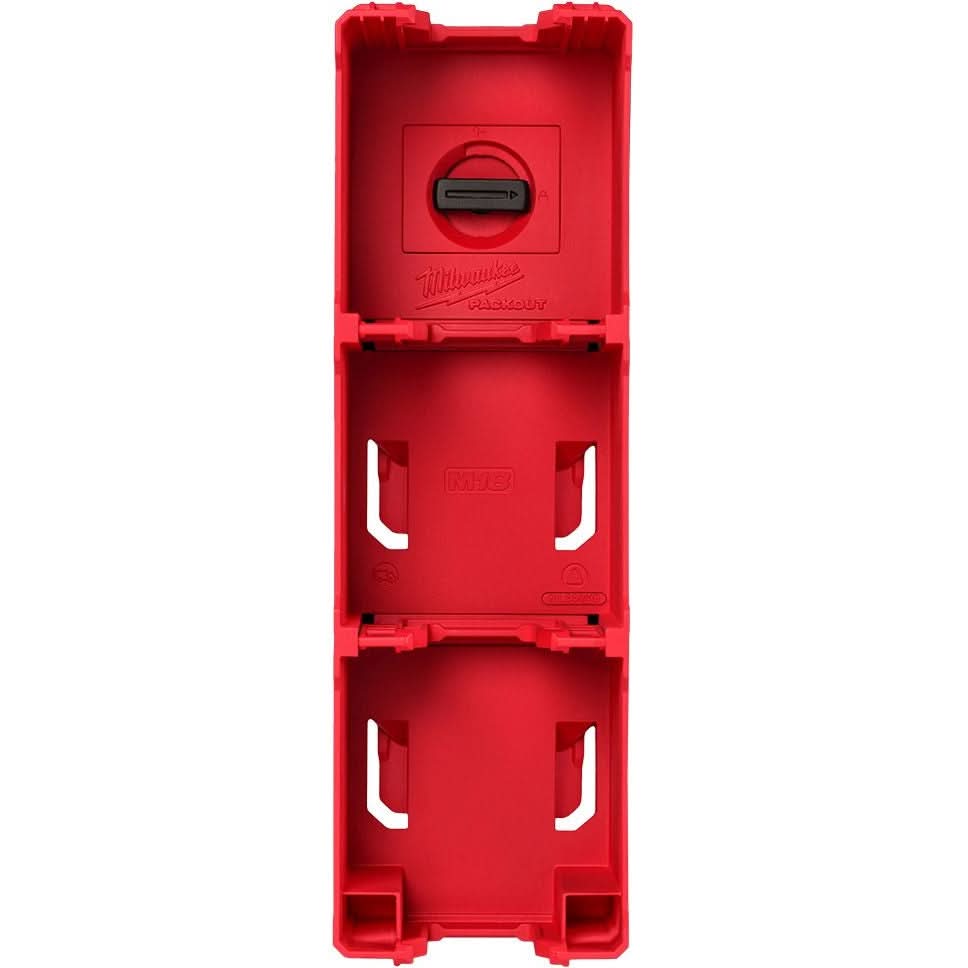
How to Wall-Mount Milwaukee M18 Batteries (and Stop Losing Bench Space to Charging Clutter)
Wall-mounting Milwaukee M18 batteries takes three things: a stud or solid backer, the right mount, and a charge-level habit. Fastest setup: (1) mount the 3-in-1 charger + battery wall rack into two studs 16 in. apart, (2) hang your M18 chargers in the upper slots, (3) snap your packs into the lower rack. Done in about 20 minutes. One warning before you buy: the M12 4-slot battery mount does not fit M18 packs — the footprint is different. The rest of this guide covers which hardware to get, how to install it, and how to store packs so they're still full months later.
Which Wall Mount Fits M18 Batteries?
Not all Milwaukee-branded battery hardware is M18-compatible. Get this wrong and you're returning a rack.
The Combo Option — Charger + Battery on One Rack

The 3-in-1 Metal Wall Mount for Milwaukee Chargers & Batteries is the one-buy solution if you want everything off the bench and onto one wall surface. It holds two chargers in the upper bracket positions and several M18 packs in the lower slots.
Pick this if: you charge at a fixed station — garage, shop, or truck bay — and want packs to come off the tool and go straight to a charged rack without hunting for a shelf.
Charger Bracket Only — When Storage Is Already Sorted

If you already have a shelf or pegboard for packs, the Wall-Mount Bracket for Milwaukee M12 & M18 Chargers handles the charger side. The mounting holes align with the existing holes on the back of Milwaukee M12 and M18 chargers, so the bracket holds the charger flush to the wall with no adapter plate needed.
Pick this if: battery storage is handled but your charger is sitting on a cord draped across the bench.
M12 4-Slot Mount — Not Compatible with M18 Packs
The 4-Slot Metal Wall Mount for Milwaukee M12 Batteries is sized for M12 geometry. M18 packs are physically larger — they won't seat or lock into the M12 rack. Buy it only if you're storing M12 batteries. If you run both platforms, put the M12 rack on one section of wall and an M18-compatible rack beside it. They can share the same wall, just not the same slots.
| Mount | Compatible Pack | Charger Slots | Best For |
|---|---|---|---|
| 3-in-1 charger + battery rack | M18 (verify M12 fit) | 2 | Full one-wall charging station |
| Charger wall bracket | M12 & M18 chargers | 1 | Adding a charger to existing storage |
| M12 4-slot battery rack | M12 only — NOT M18 | 0 | Dedicated M12 storage |
What to Do Before You Start Installing
Locate your studs. Standard framing is 16 in. on center. Find them with a stud finder and mark the centers in pencil. Do a knock-test double-check — stud finders can ghost on plumbing or fire blocking. If you're going into concrete block or metal studs, toggle bolts or masonry anchors rated for the load work, but wood studs are straightforward.
Think about the weight. A full rack of M18 packs adds up. The CP2.0 (48-11-1820) is the lightest of the common packs, the XC5.0 (48-11-1850) weighs 1.8 lbs, the XC6.0 (48-11-1865) weighs 1.6 lb, and the FORGE HD12.0 (48-11-1813) weighs 3.3 lbs. Studs handle this load easily. Drywall anchors alone won't.
Tools: stud finder, pencil, level, drill/driver. Fastener: use the hardware included with the mount, or check the product page for the recommended screw size and length.
Height. Forty-eight to sixty inches off the floor puts packs at comfortable arm height — no stooping, no reaching over your head mid-task.
How to Install a Milwaukee M18 Battery Wall Mount (Step-by-Step)
1. Mark stud centers. Locate at least two studs and mark the centerlines at your target height. Give each mark a tug-test before driving anything.
2. Position the mount and mark screw holes. Hold the rack against the wall at working height. Mark the top screw hole positions in pencil while keeping the bracket level.
3. Drive the top screws first. Get the top two screws seated into studs, check level, then drive the remaining screws. A degree off at the top multiplies as you work down the rack.
4. For the 3-in-1: hang chargers and plug in. Slide your M18 chargers into the upper bracket slots, plug into a nearby outlet, and route the cord up the wall with a cable staple. Keep the cord away from the lower battery slots so packs can seat cleanly.
5. Snap batteries into the lower slots. Terminals face into the rack. If a pack isn't seating smoothly, check that you're not trying to put an M12 pack into an M18-spec slot.
6. Charger bracket only: Drive directly into two studs. Run a pilot hole first to avoid splitting a stud near the edge of the bay.
How to Store M18 Batteries So They're Not Dead When You Need Them
Charge level. For any storage stretch beyond a few weeks, store packs at a partial charge — not fully charged and not discharged. A fully charged pack sitting in summer heat degrades faster than one at partial charge. A pack stored completely dead can be permanently damaged — some cells won't recover from a deep discharge. If you pull a pack off the wall and it won't charge, see troubleshooting battery charging issues.
Temperature. Milwaukee publishes a storage temperature range on the product support page — a cold garage is generally fine as long as temperatures don't reach extremes in either direction. Don't pull a cold pack off the wall and put it straight on the charger — let it warm to room temperature first, or the charger will refuse the pack. Full detail on cold-weather charging: cold-weather charging guidance.
Long-term. Packs sitting for more than 90 days should be checked and topped up periodically — consult Milwaukee's support page for the recommended interval.
Basics: No direct sunlight on packs. No metal shavings or debris on terminals. Don't stack packs terminal-to-terminal in a bucket or drawer. The wall mount solves the last problem by design.
For the full multi-platform storage breakdown, see power-tool battery storage guide.
FAQ
Can you store Milwaukee M18 batteries on a wall mount? Yes. The 3-in-1 charger + battery wall rack is built exactly for this — batteries snap into the lower slots, chargers mount in the upper positions, everything installs into studs to handle the combined weight.
Does Milwaukee make a battery wall mount? Milwaukee makes charger mounting brackets (the wall bracket in our catalog mounts one M12 or M18 charger directly to the stud). The 3-in-1 combo rack is a third-party metal mount designed to accept Milwaukee battery geometry and pair with M18 chargers. Milwaukee also makes their own branded M18 battery storage solution: the PACKOUT™ M18™ Battery Rack (Model 48-22-8339).
What charge level should Milwaukee M18 batteries be stored at? Milwaukee recommends storing M18 batteries at a partial, moderate charge level — not fully charged and not run down. Never put a pack away fully discharged — that's the fastest way to end up with a battery that won't accept a charge next season.
Can M18 batteries be stored in a cold garage? Storage in the cold is generally fine as long as temps stay within Milwaukee's published storage range of −10°C to 50°C (14°F to 122°F). What you shouldn't do is pull a cold pack off the wall and immediately put it on the charger — chargers reject packs below certain temperature thresholds. Let the pack warm up for 20–30 minutes first. More on this: cold-weather charging guidance.
Will M18 batteries fit the Milwaukee M12 wall mount? No. The M12 4-slot rack is designed for the smaller M12 battery footprint. M18 packs are physically larger and won't seat or lock into an M12 rack. If you run both platforms, use separate mounts on the same wall section.
How many M18 batteries fit on the 3-in-1 wall mount? The 3-in-1 mount holds 5 M18 batteries in the lower rack slots, plus two chargers in the upper bracket positions.
The full line of Milwaukee wall mounts, charger brackets, and M18 accessories is at Milwaukee collection — filter by type and pick the hardware that fits your wall.