
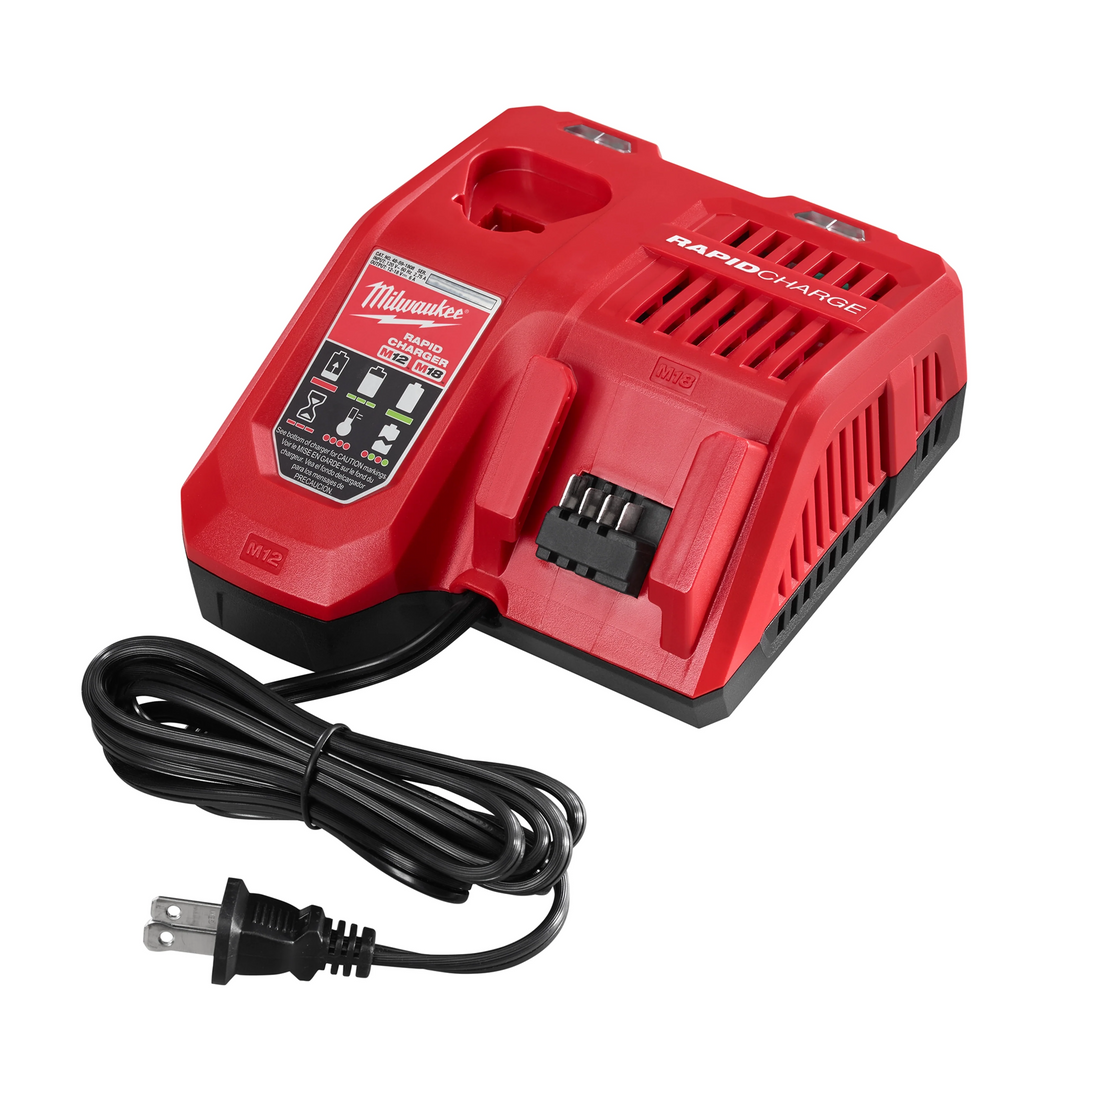
How to Mount a Milwaukee Charger to the Wall (3 Methods)
Most Milwaukee M12 and M18 chargers are designed to mount directly to the wall — two keyhole slots are molded into the back of the housing, so Method 1 requires nothing but two screws and ten minutes. No bracket, no hardware store run. If you want a cleaner install, quick-release, or you're running two chargers in a van, Methods 2 and 3 use dedicated steel brackets that drop right in. Here's the full breakdown so you can pick what actually fits your setup.
What You Need Before You Start
Tool checklist
- Drill/driver with a Phillips bit
- Level (torpedo works fine)
- Stud finder
- Pencil and tape measure
- Appropriate fasteners (see below)
Stud vs. drywall anchor
Hit a stud whenever you can — wood gives you the most reliable long-term hold. If studs don't line up with your target spot, use a weight-rated toggle anchor (50 lb minimum for a single charger). Snap-toggles are faster to install than old-school butterfly anchors and hold better in thinner drywall. Avoid plastic expansion anchors — they back out under repeated vibration.
Van or truck installs: skip drywall anchors entirely. Use #10 sheet-metal screws driven into van wall studs, or rivnut inserts if the wall is a single metal skin with nothing behind it.
Which Milwaukee chargers have built-in keyhole slots
The keyhole slots are a standard feature on most Milwaukee M12 and M18 chargers — look for two oval cutouts on the back panel of your unit. The 48-59-1804 is the model Milwaukee explicitly markets with keyhole slots; most others in the lineup feature integrated hang holes that work on the same principle. If your model doesn't have them, skip to Method 2.
Method 1 — Use the Built-In Keyhole Slots (Free, No Bracket)
How the keyhole slots work
Each slot is shaped like a keyhole: a wider opening at the top, tapering to a narrower channel below. You drive two screws into the wall, leave the heads slightly proud of the surface, then hang the charger by dropping the wide part of the slot over each screw head and sliding it down. The charger locks in place. Pull it up and out to remove.
Step-by-step
1. Hold the charger flat against the wall in the position you want it. Mark the center of each keyhole slot with a pencil — slot centers are 4.00 inches apart on M18/M12 combo chargers and 3.00 inches apart on M12-only models. 2. Use a stud finder to locate studs behind your marks. If no stud aligns, plan for toggle anchors. 3. Drive screws at your marks. Use a screw with a head wide enough to catch the slot opening — check your charger's owner's manual for the exact spec for your model. Leave the head proud of the wall surface by about 3–4 mm so the slot can catch it. 4. Hang the charger — wide part of the slot over the screw head, slide down until it seats. 5. Confirm the cord clears the wall without tension and the charge-indicator LEDs are visible from where you stand.
Limits of this method
- Charger can't be removed while a battery is plugged in (cord pulls taut)
- Works for one charger at a time — no gang-mounting
- Only works on models that have the keyhole slots; if yours doesn't, use a bracket
Method 2 — Single Wall-Mount Bracket (Clean Swap-In, Any Charger)
What the bracket does differently
The wall-mount bracket mounts to the wall first; the charger then slides in and locks. You can pull the charger off and swap it out without any tools, and the bracket works on both M12 and M18 models — with or without built-in keyhole slots. It's a cleaner look than the screw-head method and keeps the charger from shifting over time.
Step-by-step
1. Hold the bracket against the wall, level it, and mark the mounting hole positions. 2. Locate studs or install toggle anchors at your marks. 3. Drive screws through the bracket's mounting holes into the wall. 4. Slide your charger into the bracket until it clicks.
Same logic as Method 1 for stud vs. anchor — hit a stud when you can.
Best for
One-charger shops, homeowners who want a finished look, and anyone whose charger doesn't have built-in keyhole slots.
Method 3 — Dual Angled Bracket (Two Chargers, Vehicle-Ready)
When to use this
The dual angled bracket is built for two situations: running two platforms side by side (M12 and M18 on the same wall), and mounting in a service van or truck bed where a flat bracket would put the chargers at an awkward angle.
Why the angled design matters
In a vehicle, gravity works against a vertical bracket every time you hit a bump. The angled design offsets the charger toward the wall, which reduces the lever force on the mount and keeps cords from snagging on cabinet doors or van shelving. It's also easier to pull a hot pack when you're standing in a crowded cargo area.
Install notes
Same principle as Method 2 — mount the bracket, then hang the chargers. In a vehicle, use #10 sheet-metal screws into the van wall studs. Check the product listing to confirm whether vehicle mounting hardware is included or sold separately. At minimum you need one solid attachment point per screw location; don't rely on a single fastener in a mobile install.
Upgrade — The 3-in-1 Wall Mount (Chargers + Batteries, Full Station)
If you're building a proper charging station, the 3-in-1 charging station puts two chargers up top and a battery shelf below that holds up to a dozen M12 or M18 packs. Everything goes up on a single wall rack — no bench space, no scattered packs.
Install works exactly the same as Method 2: mount the rack, then load it up.
Who needs this: Anyone with three or more batteries per platform who's tired of rotating packs off the bench. A two-person crew or a small shop can genuinely fill this thing.
Who's over-buying: If you own two batteries and one charger, the free keyhole method or the single bracket is the right call. Don't spend money on rack space you won't use.
If you're doing a full shop cleanup, pair this with battery storage setup to get both the charger and the battery storage figured out at once.
Tips That Apply to All Three Methods
Mount height: 42–48 inches off the floor puts the charge-indicator LEDs at eye level and keeps the power cord from stretching to reach a standard outlet. In a vehicle, mount as low as the structure allows — lower center of gravity, less swinging on rough roads.
Cord management: Loop excess cord with a hook-and-loop strap and secure it to the bracket or a nearby hook. Don't let it hang loose where it can snag, and never hang the charger by its cord.
Cold weather: Milwaukee chargers pause charging when the battery is too cold — typically below 40°F (4°C). If your shop or garage isn't heated, don't mount the charger on an exterior wall or in an uninsulated bay. More on this at charging in cold weather.
Troubleshooting after install: If the charger lights flash red and green or won't start a charge cycle after you hang it, the battery is likely the issue, not the mount. Check charging troubleshooting first before pulling the bracket back off the wall.
FAQ
Do Milwaukee M12 and M18 chargers have mounting holes built in?
Most do. Look for two oval keyhole slots on the back panel of your charger housing. If they're there, you can hang the unit directly with two screws — no bracket required. A handful of models across both lines omit the slots, so check the back panel of your specific unit before drilling. If your model is one of the exceptions, the single wall-mount bracket handles it without modification.
What size screws do I use to mount a Milwaukee charger to the wall?
Milwaukee doesn't publish a universal screw spec for keyhole-slot mounting across the full lineup — check your charger's owner's manual for the exact recommendation for your model. A #10 × 1-1/4 in. coarse-thread screw into a wood stud is typical for keyhole-slot mounting, but confirm this against your specific model before driving anything.
Can I mount a Milwaukee charger in my truck or van?
Yes. Use the dual angled bracket and mount it with #10 sheet-metal screws into the van wall studs. The angled design keeps cords clear and reduces bracket stress on rough roads. Avoid drywall anchors in any mobile application — they're not rated for vibration loads.
Can I mount my Milwaukee charger on drywall without hitting a stud?
Yes, with a weight-rated toggle anchor rated for at least 50 lbs. Snap-toggles are the most reliable option. Stud mounting is still the better long-term choice — if you have flexibility on placement, find the stud.
Does the wall-mount bracket work with both M12 and M18 chargers?
Yes. All three bracket options in the Tool Army catalog — the single black bracket, the dual angled bracket, and the 3-in-1 station — are listed as compatible with both M12 and M18 charger models. Confirm your charger is M12 or M18 (not MX FUEL or a specialty model) before ordering.
How high should I mount my Milwaukee charger on the wall?
Counter height — 42 to 48 inches off the floor — is the practical sweet spot. The charge-status LEDs stay visible without crouching, and a standard 6-foot power cord reaches a nearby outlet without pulling tight. In a vehicle, go lower rather than higher.
Check our Milwaukee collection if you're ready to pick one. And if this is part of a bigger shop cleanup, battery storage setup covers the battery side of the equation — worth doing both at once while the drill is already out.